Archives

All of the Mid-Day Makeup Fixes You Need to Keep Your Look Fresh

Bright Ideas, Hair, Makeup, Skin Care - Fontana Beauty Expert - August 31, 2015


All of the Mid-Day Makeup Fixes You Need to Keep Your Look Fresh

Reapply Makeup

Photo @KarlieKloss

It’s happened to us all: It’s 8 a.m. your makeup is Kardashian perfect and completely selfie-worthy. But after a long morning commute, a series of unexpected meetings, stress, spilled coffee and more stress later, it’s 2 p.m. and your makeup now resembles something from a low-budget Halloween movie.

With smudges, redness and creasing in tow, a mid-day makeup application is often a necessary evil. But let’s be real, you likely don’t have the time, patience or energy to completely re-do your entire look. On the flip side, applying more product on top of an already made up face can leave you feeling cakey, overdone and just plain uncomfortable. Thankfully, we recruited the help of celebrity makeup artist and butter London Global Colour Ambassador Katie Jane Hughes to help bring your makeup back to life.

Freshen Up Your Face

The face can be a big area of concern when re-doing makeup on the fly. Sweat, rain and other unsightly elements can be to blame for making your foundation, BB cream or concealer seem to vanish. Plus, throughout the day you’re likely touching your face, leaning on your knuckles and otherwise using your digits to destroy your makeup. If your skin sees creases or indents from your hands, try a little hydrating facial mist and gulp down a glass of water, says Hughes. “The hydration will help the skin become more neutral,” she explains of the quick skin-boosting trick.

If redness is a concern, Hughes suggests taking a damp sponge and dabbing it around the skin. “This will freshen the base makeup,” she explains. “You can then take that same sponge with your foundation and dab on the areas that need more coverage.” Tip:If applying more foundation or makeup products is a must for you, try pressing the product on only certain areas to avoid piling and caking.

But it’s not just your foundation that needs a little boost. Often times, as the day goes on, exhaustion sets in and concealer wears off. To hide afternoon dark circles, Hughes says you might actually need two products. “Many people need two different concealers but don’t know it,” she says. One concealer should be a peach shade—peach counteracts blue—used to even out the shadows that form under the eyes, and the other shade should be a similar color to your foundation, she explains. Apply the peach shade first by simply pressing the product on with your ring finger, then move on to the flesh-hued concealer. Although two products are used here, the simple combo of colors will hide any signs of fatigue and help your visage looking vibrant for the rest of the day.

Evaluate the Eyes

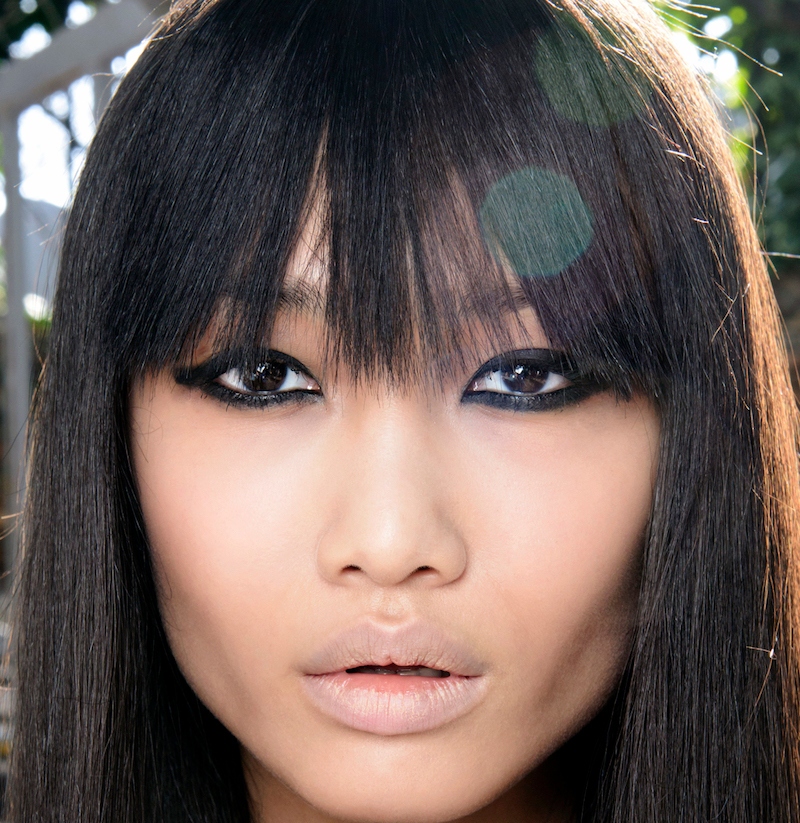
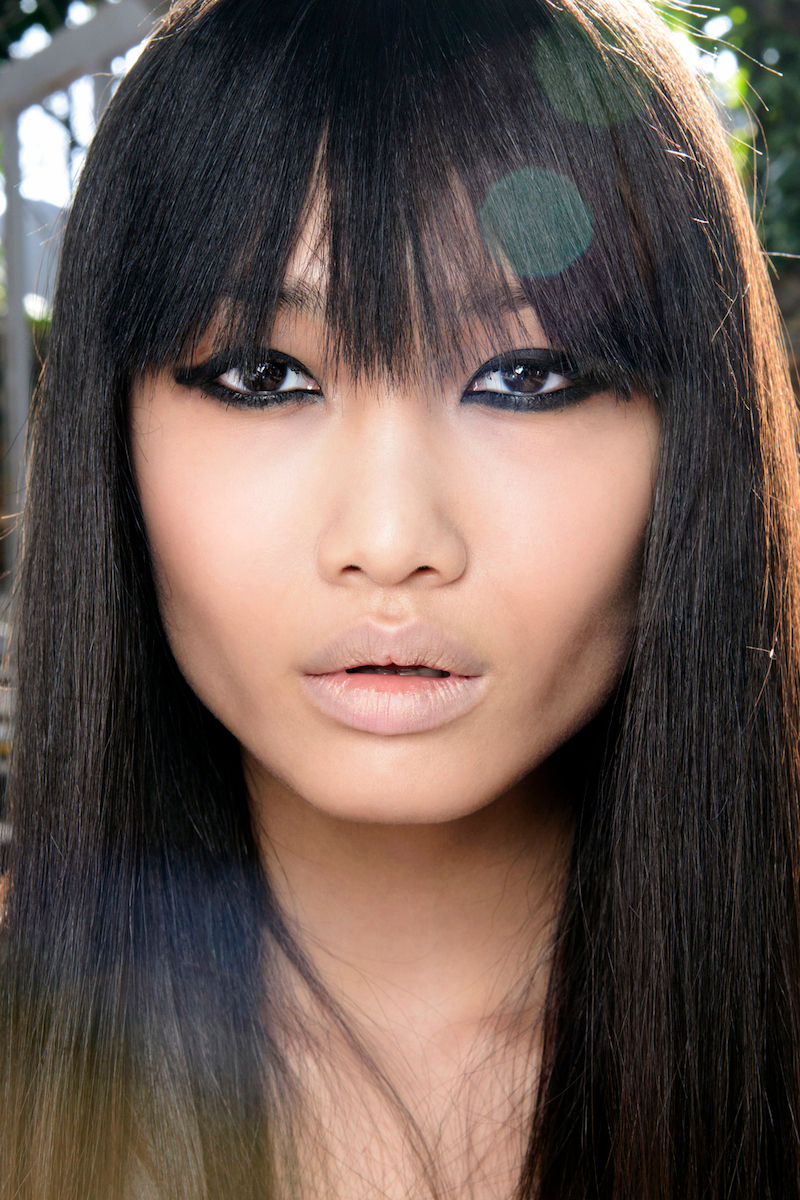
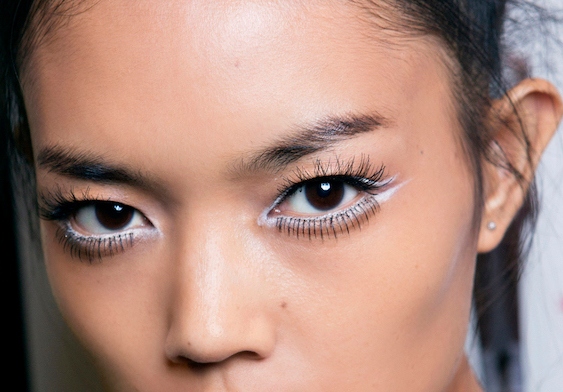
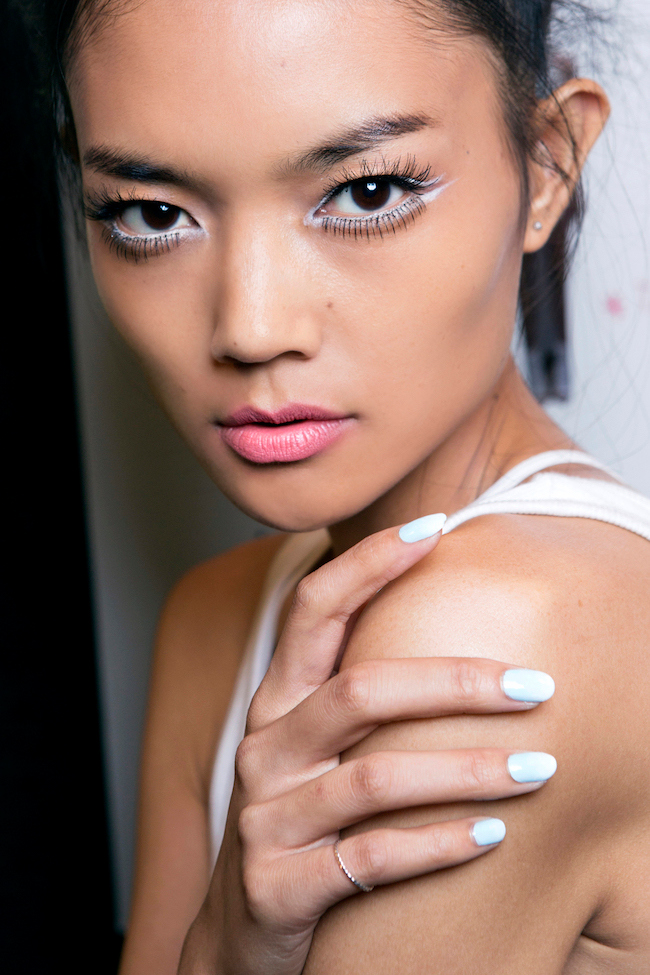
Nothing says you’re having a “rough day” quite like smudged eyeshadow. A little less-than-perfect shadow smudge can make your makeup look more lived in and a little grungy. Although that look might work wonders on Alexa Chung, for the rest of us, it tends to look sloppy. To quickly remove creases, Hughes suggests applying some cream shadow over the already-applied makeup. “You can then leave it or go over with powder shadow for more depth and staying power,” she adds.

A major cause of a mid-day makeup meltdown comes from eyeliner, eyeshadow’s even more rebellious younger sister. To figure out the best plan of attack for unruly liner, Hughes suggests looking at the way the liner is moved or smudged. “It may work just to add to it and create a more intense look,” she explains. (Think cat-eye or smudgy, smoky.) However, if your liner is simply not cooperating, dip a Q-Tip in some makeup remover and clean off the mistakes and then reapply as needed.

Mascara is the third component of eye makeup that can either make or break your look. If your mascara has clumped up, lost volume and curl and basically taken a beating throughout the day, you can actually revive your lashes fast—without washing off your old mascara. Reach for a lash primer to revitalize your peepers. Hughes suggests swiping on butter London Fit Lash Primer ($20) as it will re-wet the mascara, so you can add on another coat. We’re also fans of Urban Decay Mascara Resurrection ($16), which coats and separates lashes, making them appear as if you’ve applied fresh mascara. Finally, if you’re in a real tight spot, Hughes says opting for a different mascara formula altogether which can get the underlying mascara looking lively once again.

Know When to Start Fresh

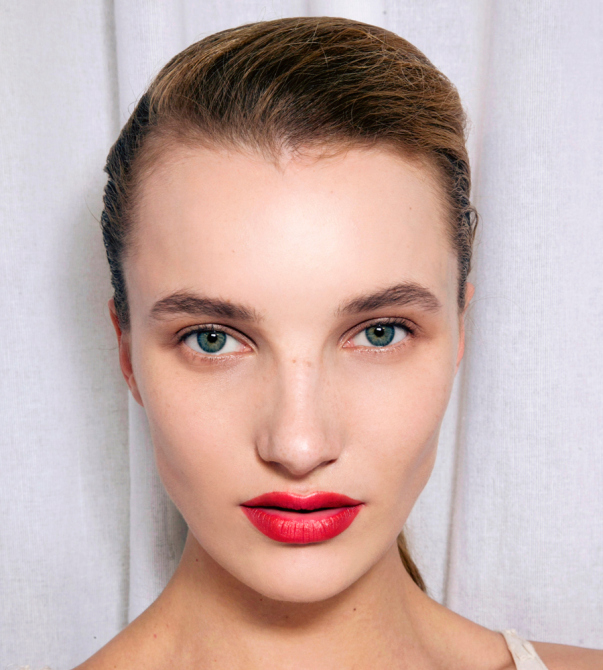
Unfortunately, not everything can be saved with a quick makeup artist trick. Filled-in brows and a bold lip are two things Hughes says it’s best to just bite the bullet and start over with. “Take them off carefully with a makeup remover soaked Q-Tip, add a hint of concealer and reapply,” she says.

Although we can’t guarantee a completely meltdown-free day, we can guarantee that your makeup won’t be the cause of your stress.

0
Continue Reading

Rita Ora’s VMAs diamond manicure cost $56,000!

Bright Ideas, Hair, Makeup - Fontana Beauty Expert - August 31, 2015


The night before the MTV Video Music Awards, Rita Ora proudly showed off her new customised manicure on Instagram. She obviously loved it, and so she should, because it cost a whopping $56,000 to create.

Rita Ora’s VMAs diamond manicure cost $56,000!
Getty Images

Only the best for a GLAMOUR cover star, hey?

Rita Ora’s VMAs diamond manicure cost $56,000!
Rex Features

Rita Ora‘s bling-tastic manicure – created by celebrity manicurist Barbara Windsor – uses Azature Black Diamond Nail Lacquer (in Ruby Diamond), and for those wondering, yes, it does contain black diamonds. The nail art was created by tiny hand-crafted diamond spiders and ruby bows. The entire manicure is thought to cost a grand total of $56,000.The night before the MTV Video Music Awards, Rita Ora proudly showed off her new customised manicure on Instagram. She obviously loved it, and so she should, because it cost a whopping $56,000 to create.

Rita Ora’s VMAs diamond manicure cost $56,000!
Getty Images

Only the best for a GLAMOUR cover star, hey?

Rita Ora’s VMAs diamond manicure cost $56,000!
Rex Features

Rita Ora‘s bling-tastic manicure – created by celebrity manicurist Barbara Windsor – uses Azature Black Diamond Nail Lacquer (in Ruby Diamond), and for those wondering, yes, it does contain black diamonds. The nail art was created by tiny hand-crafted diamond spiders and ruby bows. The entire manicure is thought to cost a grand total of $56,000.

0
Continue Reading

The Easiest Way to Trim Your Own Bangs

Bright Ideas, Hair - Fontana Beauty Expert - August 31, 2015

how_to_trim_your_bangs

If you have bangs, you know firsthand how important it is to keep them at their optimum length—half an inch too long and you’re a lost member of the Ramones, half an inch too short and you’re stuck looking like a surprised bird until they grow out. So how best to maintain them? Even if your stylist offers complimentary fringe-trims, going to the salon every other week is a serious time commitment. And if you don’t know what you’re doing, trying to cut them at home can have jagged, crooked results.

Until now. After ten years of DIY fringe maintenance, we here at StyleCaster have developed the ultimate way to maintain our bangs—and we’re breaking it down for you. Here’s how to trim your own bangs and not wind up looking like you’ve hacked at your fringe with a box cutter out of frustration.

Step #1. Spray your bangs with water and blow them out so that they’re straight and about three-quarters dry. Never cut soaking wet hair, and Never cut dry hair; both make it hard to accurately gauge length.

Bonus tip: Set aside at least half an hour to cut your bangs. Don’t try to trim them when you’re running late, when you’ve been drinking (hey, we’ve all been there) or when you’re stressed. Bangs are like horses: they can sense fear.

Step #2. Using bobby pins or alligator clips, clip back the lengths of your hair at the sides. This will help you make sure that your fringe is perfectly shaped at the scalp, and also so that there is zero chance of you cutting some accidental face-framing layers.

Step #3. Take a long piece of clear plastic tape and gently stick it to your bangs; this will be your guideline. The tape can go straight across (if you have a blunt fringe) or at an angle (if that’s the style you’re rocking), with the bottom edge of the tape denoting where you’re going to cut. Don’t do like the parent in this vintage tape ad and cut above the tape; that is a recipe for an unfortunate hair look. Remember to be more conservative with your tape guideline at first; you can easily go back and trim your hair shorter if you need to, but you can’t make it longer again.

Bonus tip: If your hair is very fine or damaged and you’re worried about the tape yanking your strands, stick it to your arm first, then peel it off. The tape will still stay, but it won’t be AS sticky—and your hair will remain healthy and unpulled.

Bonus tip #2: After ten years spent maintaining our bangs this way, we’ve found that the frosted office tape is the best to use for hair trimming purposes—the completely clear stuff is very sticky and pulls. Packing tape is definitely out. Duct tape, no damn way.

Step #5. Using a pair of hairdressing shears—not half-blunt office supply scissors you brought home from your last job—you’re now going to trim your hair. If you want blunt bangs, hold a 1″ section of hair taut between your first two fingers, start at the outside corner and snip in, slowly pulling the scissors back as you close them. This will help to pull the hair straight as you cut. If you want wispier bangs, hold the scissors horizontally and cut up and in to your hair, pulling them down as you close the blades. This will give you feathery ends.

Step #6. Continue cutting until your reach the other side. Remove the tape and dry your bangs all the way. How are they looking? If they need a little fine-tuning, dampen them again, replace the tape and trim until you’re happy. But remember: go slowly and carefully.

Step #7. You now have perfectly trimmed bangs! And if you’ve made them a touch too short, don’t worry—the good thing about bangs is that they grow quickly. In a week, any minor mistakes will have grown out.

0
Continue Reading

6 DIY Face Masks For Radiant Summer Skin

Bright Ideas, Makeup, Skin Care - Fontana Beauty Expert - July 6, 2015

We love spending our summers outdoors – from backyard barbecues and mimosas by the pool to endless days at the beach, we try to find time to do it all. The downfall? All that time in the sun takes a real toll on our skin. Of course we’re always armed with our trusty SPF, but sometimes that just isn’t enough – our skin is in need of some serious hydration.

Luckily, there’s an easy fix – DIY face masks! And not only are they super simple to make at home, but they’re  packed with a bunch of natural beauty benefits to help revitalize your skin. We’ve handpicked our favorites below, so grab your ingredients, give them a try and get ready for glowing skin!

Avocado Mask

Instagram @nutritionstripped


Avocado Honey Mask
Ingredients:
½ avocado
¼ cup of uncooked oatmeal
1 tablespoon of apple cider vinegar
2 tablespoons of honey
1 teaspoon of lemon juice

Avocados are a great source of healthy fats and antioxidants that are used in tons of different skincare products. They are essentially a skin superfood. In addition to the moisturizing properties of avocado, the oatmeal in this mask works as an exfoliator while the apple cider vinegar and lemon juice help to brighten the complexion and reduce inflammation. Simply mash up the avocado and mix in the rest of the ingredients and apply for your desired amount of time. Try integrating this mask into your summer beauty regimen once or twice a week for soft, supple skin!


honey banana organic homemade face mask

Image via sincerelykinsey.com

Banana Honey Face Mask
Ingredients:
1/2 banana (preferably ripe)
2 tablespoons of raw honey
1/2 teaspoon of cinnamon

This simple mask works wonders for oily, acne-prone skin as bananas are packed with antioxidants and potassium that naturally help combat acne while honey helps to keep skin perfectly hydrated. Simply take an overripe banana and mash it until its a semi-liquid consistency, then sprinkle in the cinnamon (an awesome, natural acne-fighting ingredient) and some honey. Mix it all together and apply to freshly cleansed skin. Leave on for 10 – 15 minutes and then rise off with warm water.

oatmealstrawberryfacemask2 6 DIY Face Masks For Radiant Summer Skin

Image via beautybets.com

Strawberry Yogurt Face Mask
Ingredients:
1/4 cup of dry rolled oats
3 tablespoons of organic plain yogurt
2 tablespoons of honey
3 strawberries

Made from fresh produce you’re likely to already have in your fridge, this hydrating ingredient mask works wonders on dry, dull skin. Strawberries are not only a great summer snack, but are the perfect addition to any at-home mask! Not only are they packed with vitamin C, but they also work as a gentle exfoliant for dry skin. To start, blend your oats to a powder-like consistency in a food processor. In a bowl, mash the strawberries with a fork (or pulse in a blender for smoother consistency) and then mix in the yogurt, honey and blended oats. Apply to face for as long as desired and then rinse off with warm water. Follow up with your favorite toner and serum for instantly glowing skin!

MORE: 5 Easy DIY Hair Masks

diy chocolate face mask 6 DIY Face Masks For Radiant Summer Skin

Image via gourmandeinthekitchen.com

All-Natural Chocolate Face Mask
Ingredients:
1/3 cup of cocoa
2 tablespoons of heavy cream
1/4 cup of honey
3 tablespoons of oatmeal powder

The perfect addition to any at-home spa night, this chocolate mask not only smells divine, but will do wonders for tired skin. The cream and honey work together to restore moisture to parched skin, while the oatmeal gently removes dead skin. Simply mix all the ingredients together and refrigerate for 5-10 minutes until the mask is cool to the touch. Then apply generously to clean skin and leave on for 10 minutes. Rinse off and follow up with a light moisturizer.

honey cinnamon exfoliating scrub done 6 DIY Face Masks For Radiant Summer Skin

Image via pinsandprocrastination.com

Exfoliating Honey Cinnamon Face Mask
Ingredients:
1/2 cup of honey
1/4 cup of baking soda
2 teaspoons of cinnamon

Dry summer heat can often take a toll on our skin leaving it burnt, dried out and flaky. Luckily, exfoliating treatments are great at combating dehydrated skin and this DIY mask is packed with natural ingredients to help restore moisture and eliminate dryness. Cinnamon, a natural astringent, works with the baking soda to remove dirt and unclog pores while the honey restores moisture without making skin oily. Mix all the ingredients together and apply onto clean skin for 15-20 minutes.

grapefruit facial mask 2 6 DIY Face Masks For Radiant Summer Skin

Image via kristineldridge.com

Grapefruit Facial Mask
Ingredients:
1 beaten egg white
juice from 1/2 grapefruit
1/2 cup of oatmeal
1 tablespoon raw honey

Citrus fruits contain natural bleaching properties that work well in conjunction with the collagen and protein in egg whites to help fade acne scars and hyper-pigmentation. The addition of raw honey and oatmeal help to moisturize and exfoliate skin for a clearer complexion. In a large bowl, whip the egg whites until they are frothy and hold a soft peak. In a separate bowl, mix together the grapefruit juice, honey and oatmeal. Fold the grapefruit mixture into the egg whites and apply mask to clean skin for 10-15 minutes.


0
Continue Reading

Get the Most Out of Your Lip Stains

Bright Ideas, Makeup - Fontana Beauty Expert - July 6, 2015

lip-stain

The beauty of lip stains? Unlike spilled coffee or a piece of chocolate that oh-so-conveniently (catch our sarcasm?) melted on your blouse, these products give you stains you actually WANT to wear. Learning how to use lip stain will end what seems like a lifetime of beauty woes—the kind that revolve around trying to get color to stay on all day long, through lunch and those inevitable snacks in-between. This was designed to last and with such a lightweight consistency making it seem like you’re not wearing anything at all. To get the most out of this product, follow some of the tips below.

Exfoliate and Moisturize
Because lip stains are really, really thin, you’re going to see imperfections a lot easier than if you were using a lip cream or a lipstick. The consistency matches something similar to a liquid, which by nature just skims the surface. That means dry, flaky pieces of skin will be in full view. Moisturize often (make this just as much as a habit as washing your face before bed) and use a product with little or natural fragrance so your lips don’t dry out quickly.

Use a Lip Liner
The color is going to stick around, but it’s not going to apply as precisely as something like a standard lipstick tube that comes to somewhat of a point. The liquid in and of itself makes it a little less easy-to-apply, even when it’s soaking up on a doe foot applicator. An easy way to combat this is to use a lip liner of the same exact color or something a little bit lighter, just so you have some guidelines when applying the lip liner. After applying lip liner, really blend those lines in so there isn’t a stark difference between the lip stain and the lip liner.

Layer Under Regular Lipstick
This is your must-use tip when you want the creamier, thicker finish of a lipstick but know the color isn’t going to last all day. Apply lip stain (something with a matte finish, like the Milani Power Lip Lasting & Moisturizing Gloss Stain  that leaves a matte finish with the option of making it glossy) before putting on your gloss. Some lip stains have incredibly long wear, so by the time your lipstick rubs off after only a few hours, you’ll still have a whole lot of tint showing. You’ll totally rid yourself of a splotchy look where only the outer rim of your lips are still holding on to the pigment.

Layer Over for Intensity or Gloss
A lot of lip stains leave a glossy finish in and of themselves, but you can make a creamy lip color glossy and even hold more of an intense color on your lips by layering a lip stain on top. It doesn’t have to be the same exact color, though. Pick different shades in the same color family for something customized to you—getting personal with fashion and beauty isn’t only done with monograms.

Need Lip TLC? Check Over the Ingredients
As the barriers between cosmetics and skin care continue to blur, lip stains are taking strides in what they offer to a customer in the ingredients list. Many products are made with nourishing oils that will bring hydration and a heavy repair to lips that are chapped or suffering from flakiness or dryness.

Use It as a Cheek Tint
Not exactly a way to make it look better on your lips, no, but lip stain is an amazing multitasker. Dab a bit on your cheeks for blush that won’t budge—just make sure you apply the smallest amount and blend out towards your ears.

0
Continue Reading

What’s The Best Brush For Your Hair?

Hair - Fontana Beauty Expert - May 11, 2015


brushing-natural-hair

Brushing your hair used to be a thing of ritual—100 strokes a night for long and luscious princess hair. But not everyone has “princess hair” per se, and everyone still needs to groom their hair one way or another. Rather than rip your hair out (figuratively and literally) over the wrong brush that may not even be detangling and styling your hair the best way it could be, here’s a brief guide to de-bunking which brush could benefit your hair the best.


Boar Bristle hair brush


A boar bristle brush is a great staple for almost any kind of hair. The natural boar bristles are excellent at distributing your scalp’s natural oils down the hair shaft, which may save you a day or two of washing. The bristles are flexible, so it won’t snag and break hair as it pulls through. Sometimes these can be densely packed though, so a thorough brushing takes several passes. These are also great for styling if you’re looking for smooth, frizz-free hair. Some of them have a mix of stiffer nylon bristles within the boar so it’s got a bit more grip for detangling and grooming.


Classic hair styling brush


Your basic weapon of choice, the classic hair styling brush has a rubber base and nylon bristles and can come in several sizes from small, medium, to large. The best thing about this brush is that it tackles detangling, blow-drying, and styling. This is an especially good pick for detangling curly hair since hair can move pretty easily through nylon bristles, and it can shape and smooth at the same time. If you’re after smooth styles, this is a good tool for blow-drying to get volume at your roots, before using round brush if you’re looking to style curled/waved ends.


paddle brush


If you have long and straight hair for the most part, a paddle brush covers a lot of ground for detangling purposes. Straight thick hair will benefit the most from this type of brush, which can come with nylon, boar, or a mixture of both bristles. Sometimes they’re vented for blow-drying purposes. The flat surface makes this a great tool for smoothing, frizz, and static-fighting. Plus, with its wide flat shape, it can fit more bristles on it and detangle your hair quicker and with less passes—so less shedding for you.

wide tooth comb

The wide-tooth comb is a must for detangling wet hair. Since lots of hair can slip through the teeth, that means less breakage for you. Wide-tooth combs are also one of the best tools for thick curly hair, since it can detangle your curls without messing with their shape, and it’s the best weapon against hair poof-age.


Round hair Brush


The round boar bristle brush is your go-to for blow-drying. By being able to wrap the hair around the barrel and brush it through and you heat style, you can create smooth curls, waves, and bends. It’s not the easiest tool for detangling, but if you’re trying to maintain a blow-out a couple days afterwards, smoothing and brushing in the direction of your hairstyle with this brush would be best to refresh the shape. Just don’t wrap hair TOO much around this or you may find yourself with a new attachment to your hair. These brushes come in all sizes, and to some degree, size does matter. The bigger the barrel, the straighter your blowout will be. Those are great for high volume styles  and for creating a relatively smooth and straight style, with flipped-out or curved-under ends. The smaller barrel, where you can wrap a section of hair around at least twice, is the one to give you waves and curls. Round brushes comes in a variation of nylon, boar, or both bristles, and the inner barrel sometimes can be ceramic or heat-conducting to help speed up your blow-out.

0
Continue Reading

Your Guide To False Eyelashes

Hair - Fontana Beauty Expert - May 11, 2015


lepore-emn-s15-005

Most of us dream of having long, full, thick lashes. And while the majority of us weren’t blessed with them naturally, we can still fake it with a little help from some friends called false lashes. But with new lash companies cropping up left and right, finding the perfect lash seems almost impossible. On top of that, there are so many different kinds to choose from–mink, synthetic, natural. So, how do you know which one is the best pick for you? While the choices may seem overwhelming, choosing t
he right false lash is easier than you think. The main thing you need to know is what look you’re going for and how comfortable you are with applying them. We’ve put together a small guide going through all the different types of false lashes you can choose from, so you’ll know exactly what to get next time you’re shopping for a pair.

Human hair
Many affordable, good quality lashes that you find at your local drugstore or beauty supply store are made with human hair. These lashes tend to have thin bands and are extremely easy to apply and comfortable to wear. Since they are made from human hair, they look very natural, but can still create a super dramatic effect. With these types of lashes, you can usually only get 3 or 4 wears out of them before they start to look wonky. But at such an affordable price, these are the perfect types of lashes to buy in bulk if you’re a lash-a-holic, or to just try out if you’re a newbie.

Synthetic hair
Many affordable lashes are also made from synthetic hair. Sometimes you’ll find human hair lashes mixed with synthetic fibers, often on more dramatic styles to create a more sturdy shape. Other times, you’ll find a complete strip of synthetic hair lashes. These lashes tend to be a bit harder to work with–the lash band is usually thick and not as flexible as a standard, human hair lash band. Synthetic hair lashes tend to look less natural, but are still great for adding some drama to your look. Similar to natural hair lashes, they can be reused up to 5 times.

Mink hair

Mink hair lashes are definitely the most luxurious lashes on the market. They create the most soft, fluffy, yet dramatic effect to the eyes. Mink lashes come in an array of styles, from light and natural to full on glam. While they usually start at around $25 a pair, they can be reused 25 to 30 times! If you can’t leave the house without your lashes on, minks are definitely worth the buy.

Individual lashes
If you want the most natural look possible, or if maybe you just hate fighting with strip lashes, individual lashes are the way to go. Individual lashes usually come in a variety of lengths as single lashes or tiny clusters of 3. They can be placed anywhere you want on the lash line–so you’re basically creating your own custom false lash shape. How cool is that? Applying them takes a bit of practice, but once you get the hang of it, you can’t even tell they’re there!

Bottom lashes
Unfortunately, some of us were cursed with non-existent lower lashes. And that’s okay! Because now false bottom lashes exist and our lives are changed forever. False bottom lashes come on a clear band and are applied underneath your lower lashes to give them a longer, fuller, yet still natural, appearance. So you can forget clumping on mascara.

0
Continue Reading

Beauty Lessons Learned From Pharrell

Hair - Fontana Beauty Expert - April 25, 2015

IMG_18751-613x408Not to put Pharrell on blast, but the guy is 42. FORTY-TWO. Wrinkles clearly do not exist in his life (or he’s got the best derm in town on speed dial). Since he hasn’t copped to that, we’re left with these little gems he told us back in 2013:

“You have to clean your face. You can’t sit around and assume it’s going to be OK.” Basically, don’t sleep in your makeup. Pretty standard. There has to be more. In the absence of anything else straight from the source, we’ve resorted to second-hand advice:

“I only wash my face with cold water, but I got that from Pharrell, who got that from Naomi Campbell. I heard it on a radio show—it keeps things tight,” Yashua Simmons said in his Top Shelf.

Then there’s the reliable Google, which will provide searches with the irresistible SEO headline “Pharrell Williams denies being a vampire.” Riley Montana asked Google and Google answered for Pharrell. “I’ve been trying Cetaphil, and it actually helps a lot. I got that from Pharrell. He looks so young—I had to know what he did, so I Googled it. And I drink a lot of water—that came from Pharrell, too.”

Simple—no grandiose blood-of-virgins here (disappointingly enough)—but while not exciting, effective it is. And if that’s enough for Pharrell, no one’s complaining about going to CVS and buying a bottle of $5 cleanser.

0
Continue Reading

Delicious Foods That Will Boost Your Mood

Bright Ideas - Fontana Beauty Expert - April 17, 2015

If you’re ever feeling pretty blah as you go about your day, you may want to consider if your diet could be the culprit. A lack of certain nutrients in the diet has been associated with depression, so it is important to eat an overall healthy diet on a daily basis. If we eat better foods like lean proteins, whole grains, fresh fruits and vegetables, and fish, we short circuit the junk food cravings and have higher energy levels and sharper mental focus.

98110638Tooga/Digital Vision/Getty Images

If you’re ever feeling pretty blah as you go about your day, you may want to consider if your diet could be the culprit. A lack of certain nutrients in the diet has been associated with depression, so it is important to eat an overall healthy diet on a daily basis. If we eat better foods like lean proteins, whole grains, fresh fruits and vegetables, and fish, we short circuit the junk food cravings and have higher energy levels and sharper mental focus, says Rene Ficek, a registered dietitian who is also the Lead Nutrition Expert at Seattle Sutton’s Healthy Eating. Eating certain foods (outlined below) may not put us in an instantly great mood, but can give you a mood boost!

Walnuts and Fatty Fish
When it comes to omega-3 fatty acids, no food source is better than fatty fish like tuna, mackerel, bluefish, and salmon. These fats have specific brain boosting properties to fight depression, and as an added bonus they improve circulation and reduce inflammation and your overall risk of heart disease, says Ficek. If you are vegetarian or vegan, reach for the walnuts because they are the richest plant based sources of omega-3 fatty acids.

Eggs

A number of studies have found an association between low vitamin D levels and mood disorders including depression, PMS and seasonal affective disorder (SAD), says Rise coach, Lori Rosenthal, MS, RD, CDN. Egg yolk is a good source of vitamin D, along with fatty fish and fortified cereals. Tip: Limit yourself to 1 egg yolk per day.

Whole Grains
High fiber carbohydrates found in whole grains can leave you feeling good and doing your body good at the same time. Whole grains, brown rice, oatmeal, sweet potatoes, and whole wheat pasta are all good choices since they assist the body with release of serotonin, the feel good hormone, says Ficek.

Water
Adequate hydration is essential for our body to run smoothly. When we are dehydrated, our bodies have to work harder, leaving us dragging, says Rosenthal. Getting enough fluids will help boost your mood and energy levels. Tip: Sugary drinks, including juice, soda, and sports drinks not only can lead to a energy crash, but also contribute to diabetes and obesity. Try to hydrate sugar-free.

Green Tea
Green tea is rich in the amino acid, theanine. This amino acid naturally found in tea leaves provides an anti-stress relaxation benefit to drinkers. Plus, green tea gives a boost of relaxed alertness rather than the boost of tension or anxiety that coffee drinkers report, says Ficek.

In fact, a new study, published in the American Journal of Clinical Nutrition, found that tea consumption may be linked to improved mood, mental alertness and problem solving! Think of that the next time you are cramming for that big final exam.

MORE: Late-Night Snacks That Won’t Make You Gain Weight

Turmeric
If you’re feeling down, this bold spice found in many Indian and Asian curry dishes can help boost your mood. It’s loaded with anti-inflammatory properties and contains the active compounds turmerones and curcuminods, which also provide a wide variety of health benefits, says Ficek.

Chocolate
A lot of us turn to chocolate when we’re having a bad day, and it may be instinctual! Eating dark chocolate has been shown to reduce stress hormones, including cortisol, according to this study done at the Nestlé Research Center in Switzerland. This could be due to the antioxidants in chocolate, but it’s delicious and makes us feel better, so we’re happy it’s good for us, too.

Spinach
Leafy green vegetables, including spinach, are packed with health promoting nutrients including folic acid, which has been found to positively affect mood, says Rosenthal. Beans, asparagus and oranges are also good sources of folic acid.

0
Continue Reading

Fontana Beauty Vibes Expo

Makeup - Fontana Beauty Expert - April 10, 2015

For the first time Fontana Beauty Vybes Expo. Mandeville Jamaica indegenerique.be.

 
Fontana Beauty Vibes Expo_Promo2015_IGPost_AW

0
Continue Reading