Our eyes say so much about us. They are said to be the windows to the soul; they tell when we are sick and tired and display so many of our emotions. So, let’s show off your beautiful eyes and help them out in their story telling.
0

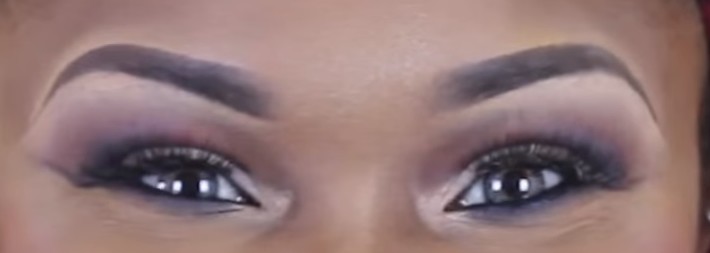

If you haven’t heard the AMAZING news! POMI By Lyric is NOW available at Fontana Pharmacy stores ISLAND WIDE!!!! Continue Reading
If you haven’t heard the AMAZING news! POMI By Lyric is NOW available at Fontana Pharmacy stores ISLAND WIDE!!!!


Photo @KarlieKloss
It’s happened to us all: It’s 8 a.m. your makeup is Kardashian perfect and completely selfie-worthy. But after a long morning commute, a series of unexpected meetings, stress, spilled coffee and more stress later, it’s 2 p.m. and your makeup now resembles something from a low-budget Halloween movie.
With smudges, redness and creasing in tow, a mid-day makeup application is often a necessary evil. But let’s be real, you likely don’t have the time, patience or energy to completely re-do your entire look. On the flip side, applying more product on top of an already made up face can leave you feeling cakey, overdone and just plain uncomfortable. Thankfully, we recruited the help of celebrity makeup artist and butter London Global Colour Ambassador Katie Jane Hughes to help bring your makeup back to life.
Freshen Up Your Face
The face can be a big area of concern when re-doing makeup on the fly. Sweat, rain and other unsightly elements can be to blame for making your foundation, BB cream or concealer seem to vanish. Plus, throughout the day you’re likely touching your face, leaning on your knuckles and otherwise using your digits to destroy your makeup. If your skin sees creases or indents from your hands, try a little hydrating facial mist and gulp down a glass of water, says Hughes. “The hydration will help the skin become more neutral,” she explains of the quick skin-boosting trick.
If redness is a concern, Hughes suggests taking a damp sponge and dabbing it around the skin. “This will freshen the base makeup,” she explains. “You can then take that same sponge with your foundation and dab on the areas that need more coverage.” Tip:If applying more foundation or makeup products is a must for you, try pressing the product on only certain areas to avoid piling and caking.
But it’s not just your foundation that needs a little boost. Often times, as the day goes on, exhaustion sets in and concealer wears off. To hide afternoon dark circles, Hughes says you might actually need two products. “Many people need two different concealers but don’t know it,” she says. One concealer should be a peach shade—peach counteracts blue—used to even out the shadows that form under the eyes, and the other shade should be a similar color to your foundation, she explains. Apply the peach shade first by simply pressing the product on with your ring finger, then move on to the flesh-hued concealer. Although two products are used here, the simple combo of colors will hide any signs of fatigue and help your visage looking vibrant for the rest of the day.
Evaluate the Eyes
Nothing says you’re having a “rough day” quite like smudged eyeshadow. A little less-than-perfect shadow smudge can make your makeup look more lived in and a little grungy. Although that look might work wonders on Alexa Chung, for the rest of us, it tends to look sloppy. To quickly remove creases, Hughes suggests applying some cream shadow over the already-applied makeup. “You can then leave it or go over with powder shadow for more depth and staying power,” she adds.
A major cause of a mid-day makeup meltdown comes from eyeliner, eyeshadow’s even more rebellious younger sister. To figure out the best plan of attack for unruly liner, Hughes suggests looking at the way the liner is moved or smudged. “It may work just to add to it and create a more intense look,” she explains. (Think cat-eye or smudgy, smoky.) However, if your liner is simply not cooperating, dip a Q-Tip in some makeup remover and clean off the mistakes and then reapply as needed.
Mascara is the third component of eye makeup that can either make or break your look. If your mascara has clumped up, lost volume and curl and basically taken a beating throughout the day, you can actually revive your lashes fast—without washing off your old mascara. Reach for a lash primer to revitalize your peepers. Hughes suggests swiping on butter London Fit Lash Primer ($20) as it will re-wet the mascara, so you can add on another coat. We’re also fans of Urban Decay Mascara Resurrection ($16), which coats and separates lashes, making them appear as if you’ve applied fresh mascara. Finally, if you’re in a real tight spot, Hughes says opting for a different mascara formula altogether which can get the underlying mascara looking lively once again.
Know When to Start Fresh
Unfortunately, not everything can be saved with a quick makeup artist trick. Filled-in brows and a bold lip are two things Hughes says it’s best to just bite the bullet and start over with. “Take them off carefully with a makeup remover soaked Q-Tip, add a hint of concealer and reapply,” she says.
Although we can’t guarantee a completely meltdown-free day, we can guarantee that your makeup won’t be the cause of your stress.

The night before the MTV Video Music Awards, Rita Ora proudly showed off her new customised manicure on Instagram. She obviously loved it, and so she should, because it cost a whopping $56,000 to create.

Only the best for a GLAMOUR cover star, hey?

Rita Ora‘s bling-tastic manicure – created by celebrity manicurist Barbara Windsor – uses Azature Black Diamond Nail Lacquer (in Ruby Diamond), and for those wondering, yes, it does contain black diamonds. The nail art was created by tiny hand-crafted diamond spiders and ruby bows. The entire manicure is thought to cost a grand total of $56,000.The night before the MTV Video Music Awards, Rita Ora proudly showed off her new customised manicure on Instagram. She obviously loved it, and so she should, because it cost a whopping $56,000 to create.
Only the best for a GLAMOUR cover star, hey?
Rita Ora‘s bling-tastic manicure – created by celebrity manicurist Barbara Windsor – uses Azature Black Diamond Nail Lacquer (in Ruby Diamond), and for those wondering, yes, it does contain black diamonds. The nail art was created by tiny hand-crafted diamond spiders and ruby bows. The entire manicure is thought to cost a grand total of $56,000.

Luckily, there’s an easy fix – DIY face masks! And not only are they super simple to make at home, but they’re packed with a bunch of natural beauty benefits to help revitalize your skin. We’ve handpicked our favorites below, so grab your ingredients, give them a try and get ready for glowing skin!

Instagram @nutritionstripped
Avocado Honey Mask
Ingredients:
½ avocado
¼ cup of uncooked oatmeal
1 tablespoon of apple cider vinegar
2 tablespoons of honey
1 teaspoon of lemon juice
Avocados are a great source of healthy fats and antioxidants that are used in tons of different skincare products. They are essentially a skin superfood. In addition to the moisturizing properties of avocado, the oatmeal in this mask works as an exfoliator while the apple cider vinegar and lemon juice help to brighten the complexion and reduce inflammation. Simply mash up the avocado and mix in the rest of the ingredients and apply for your desired amount of time. Try integrating this mask into your summer beauty regimen once or twice a week for soft, supple skin!

Image via sincerelykinsey.com
Banana Honey Face Mask
Ingredients:
1/2 banana (preferably ripe)
2 tablespoons of raw honey
1/2 teaspoon of cinnamon
This simple mask works wonders for oily, acne-prone skin as bananas are packed with antioxidants and potassium that naturally help combat acne while honey helps to keep skin perfectly hydrated. Simply take an overripe banana and mash it until its a semi-liquid consistency, then sprinkle in the cinnamon (an awesome, natural acne-fighting ingredient) and some honey. Mix it all together and apply to freshly cleansed skin. Leave on for 10 – 15 minutes and then rise off with warm water.

Image via beautybets.com
Strawberry Yogurt Face Mask
Ingredients:
1/4 cup of dry rolled oats
3 tablespoons of organic plain yogurt
2 tablespoons of honey
3 strawberries
Made from fresh produce you’re likely to already have in your fridge, this hydrating ingredient mask works wonders on dry, dull skin. Strawberries are not only a great summer snack, but are the perfect addition to any at-home mask! Not only are they packed with vitamin C, but they also work as a gentle exfoliant for dry skin. To start, blend your oats to a powder-like consistency in a food processor. In a bowl, mash the strawberries with a fork (or pulse in a blender for smoother consistency) and then mix in the yogurt, honey and blended oats. Apply to face for as long as desired and then rinse off with warm water. Follow up with your favorite toner and serum for instantly glowing skin!

Image via gourmandeinthekitchen.com
All-Natural Chocolate Face Mask
Ingredients:
1/3 cup of cocoa
2 tablespoons of heavy cream
1/4 cup of honey
3 tablespoons of oatmeal powder
The perfect addition to any at-home spa night, this chocolate mask not only smells divine, but will do wonders for tired skin. The cream and honey work together to restore moisture to parched skin, while the oatmeal gently removes dead skin. Simply mix all the ingredients together and refrigerate for 5-10 minutes until the mask is cool to the touch. Then apply generously to clean skin and leave on for 10 minutes. Rinse off and follow up with a light moisturizer.

Image via pinsandprocrastination.com
Exfoliating Honey Cinnamon Face Mask
Ingredients:
1/2 cup of honey
1/4 cup of baking soda
2 teaspoons of cinnamon
Dry summer heat can often take a toll on our skin leaving it burnt, dried out and flaky. Luckily, exfoliating treatments are great at combating dehydrated skin and this DIY mask is packed with natural ingredients to help restore moisture and eliminate dryness. Cinnamon, a natural astringent, works with the baking soda to remove dirt and unclog pores while the honey restores moisture without making skin oily. Mix all the ingredients together and apply onto clean skin for 15-20 minutes.

Image via kristineldridge.com
Grapefruit Facial Mask
Ingredients:
1 beaten egg white
juice from 1/2 grapefruit
1/2 cup of oatmeal
1 tablespoon raw honey
Citrus fruits contain natural bleaching properties that work well in conjunction with the collagen and protein in egg whites to help fade acne scars and hyper-pigmentation. The addition of raw honey and oatmeal help to moisturize and exfoliate skin for a clearer complexion. In a large bowl, whip the egg whites until they are frothy and hold a soft peak. In a separate bowl, mix together the grapefruit juice, honey and oatmeal. Fold the grapefruit mixture into the egg whites and apply mask to clean skin for 10-15 minutes.

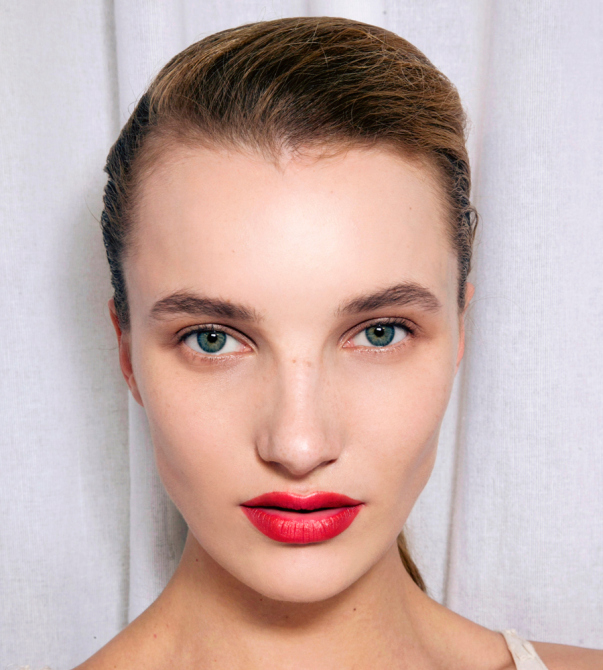
The beauty of lip stains? Unlike spilled coffee or a piece of chocolate that oh-so-conveniently (catch our sarcasm?) melted on your blouse, these products give you stains you actually WANT to wear. Learning how to use lip stain will end what seems like a lifetime of beauty woes—the kind that revolve around trying to get color to stay on all day long, through lunch and those inevitable snacks in-between. This was designed to last and with such a lightweight consistency making it seem like you’re not wearing anything at all. To get the most out of this product, follow some of the tips below.
Exfoliate and Moisturize
Because lip stains are really, really thin, you’re going to see imperfections a lot easier than if you were using a lip cream or a lipstick. The consistency matches something similar to a liquid, which by nature just skims the surface. That means dry, flaky pieces of skin will be in full view. Moisturize often (make this just as much as a habit as washing your face before bed) and use a product with little or natural fragrance so your lips don’t dry out quickly.
Use a Lip Liner
The color is going to stick around, but it’s not going to apply as precisely as something like a standard lipstick tube that comes to somewhat of a point. The liquid in and of itself makes it a little less easy-to-apply, even when it’s soaking up on a doe foot applicator. An easy way to combat this is to use a lip liner of the same exact color or something a little bit lighter, just so you have some guidelines when applying the lip liner. After applying lip liner, really blend those lines in so there isn’t a stark difference between the lip stain and the lip liner.
Layer Under Regular Lipstick
This is your must-use tip when you want the creamier, thicker finish of a lipstick but know the color isn’t going to last all day. Apply lip stain (something with a matte finish, like the Milani Power Lip Lasting & Moisturizing Gloss Stain that leaves a matte finish with the option of making it glossy) before putting on your gloss. Some lip stains have incredibly long wear, so by the time your lipstick rubs off after only a few hours, you’ll still have a whole lot of tint showing. You’ll totally rid yourself of a splotchy look where only the outer rim of your lips are still holding on to the pigment.
Layer Over for Intensity or Gloss
A lot of lip stains leave a glossy finish in and of themselves, but you can make a creamy lip color glossy and even hold more of an intense color on your lips by layering a lip stain on top. It doesn’t have to be the same exact color, though. Pick different shades in the same color family for something customized to you—getting personal with fashion and beauty isn’t only done with monograms.
Need Lip TLC? Check Over the Ingredients
As the barriers between cosmetics and skin care continue to blur, lip stains are taking strides in what they offer to a customer in the ingredients list. Many products are made with nourishing oils that will bring hydration and a heavy repair to lips that are chapped or suffering from flakiness or dryness.
Use It as a Cheek Tint
Not exactly a way to make it look better on your lips, no, but lip stain is an amazing multitasker. Dab a bit on your cheeks for blush that won’t budge—just make sure you apply the smallest amount and blend out towards your ears.


If you’ve been on the hunt for a great pressed powder foundation for African American women, search no more black ladies! IMAN’s Pressed Powder matches your skin tone, removes shine and provides full even coverage for your black skin.
Hello Classy Black Ladies! I am very pleased to provide you with this review of IMAN’s Luxury Pressed Powder.
I have been searching high and low for a pressed powder foundation that will not only match my skin tone but also *not* make me look like I just stepped out of Michael Jackson’s thriller video shoot! I like my dark skin tone with its golden undertone and I want it to look that way whether I have foundation on or not.
It seems that I visit the beauty section of my local pharmacy every month looking for a new pressed powder. I’ve tried powder foundations by L’Oreal, Maybelleine and all the major brands, but they do not match my skin tone and do not provide even coverage.
I’ve also tried liquid foundations, like Maybelleine’s Dream Liquid Mousse (my last brand) but they just made my face look greasy and uneven.
About a month ago I was sorting through my foundation options in the beauty section of my pharmacy yet again, and picked up a new powder press foundation by one of the majors. I sighed, knowing that it would probably not work out, as I walked toward the register.
Then, like a beacon of light, I happened to look back toward the beauty section and saw a display for IMAN cosmetics. I’d never seen her beauty products in Fontana before.
I went over and picked up her Pressed Powder in Earth Dark. I went home and immediately tried….. the results??
WOW! I was truly amazed. The color didn’t seem like it would match my skin tone when I looked at it in the case, but when I put it on my face it blended perfectly. The pressed powder provided full coverage over my skin and didn’t make me look like a Black Zombie! Yay! It looked like my own natural skin tone.


